 |
| sorry I don't know how to make the pictures rotate if someone does please inform me but cute huh? |
See isn't that adorable. Want to make your own? Ok all you need is a plain onesie (it doesn't have to be white I think most any color would work), some yellow material (mine was an old scrap t-shirt), white material (again mine was a scrap t-shirt), tiny black buttons, small black buttons, 3/4 in black ribbon, 1/4 in black ribbon, sewing machine, gray/black embroidery thread (Again with almost all my projects this is just what I used. Play around with sizes and material. I bet a bee would be cute with big buttons for eyes too.)
1st thing is to decide how big you want your bee to be. Cut out the basic body shape, by folding your material in half so that it will be symmetrical. Then lay out your material on your shirt to make your bee and see where you want everything and how you want to space it. I used an erasable ink marker to put dots where I wanted the eyes, mouth, etc. You also need to cut your ribbon to length and the right shape. Lay your ribbon on the bee body and trim it just a bit larger than needed. Then heat seal the edges with a lighter.
Now sew on your eyes by hand and stitch your mouth on. Look it is cute already. ;) Next are your stripes. You can hand sew them on, use stitch witchery, your machine, etc. My material is really small and thin so I decided to hand stitch them on. It was a little more time consuming but I am happy with the result.


Now that you have your bee all put together pin it to your onesie and stitch it on with your sewing machine. (you could sew it on by hand if you don't have a sewing machine) My machine wanted to fight with me for some reason but we made it around finally. After the body is attached you will want to hand stitch the antenna down and add the buttons.

You could stop here but I felt my bee needed wings. I used my erasable ink to make the design of my wings and then just hand stitched them on using embroidery thread.
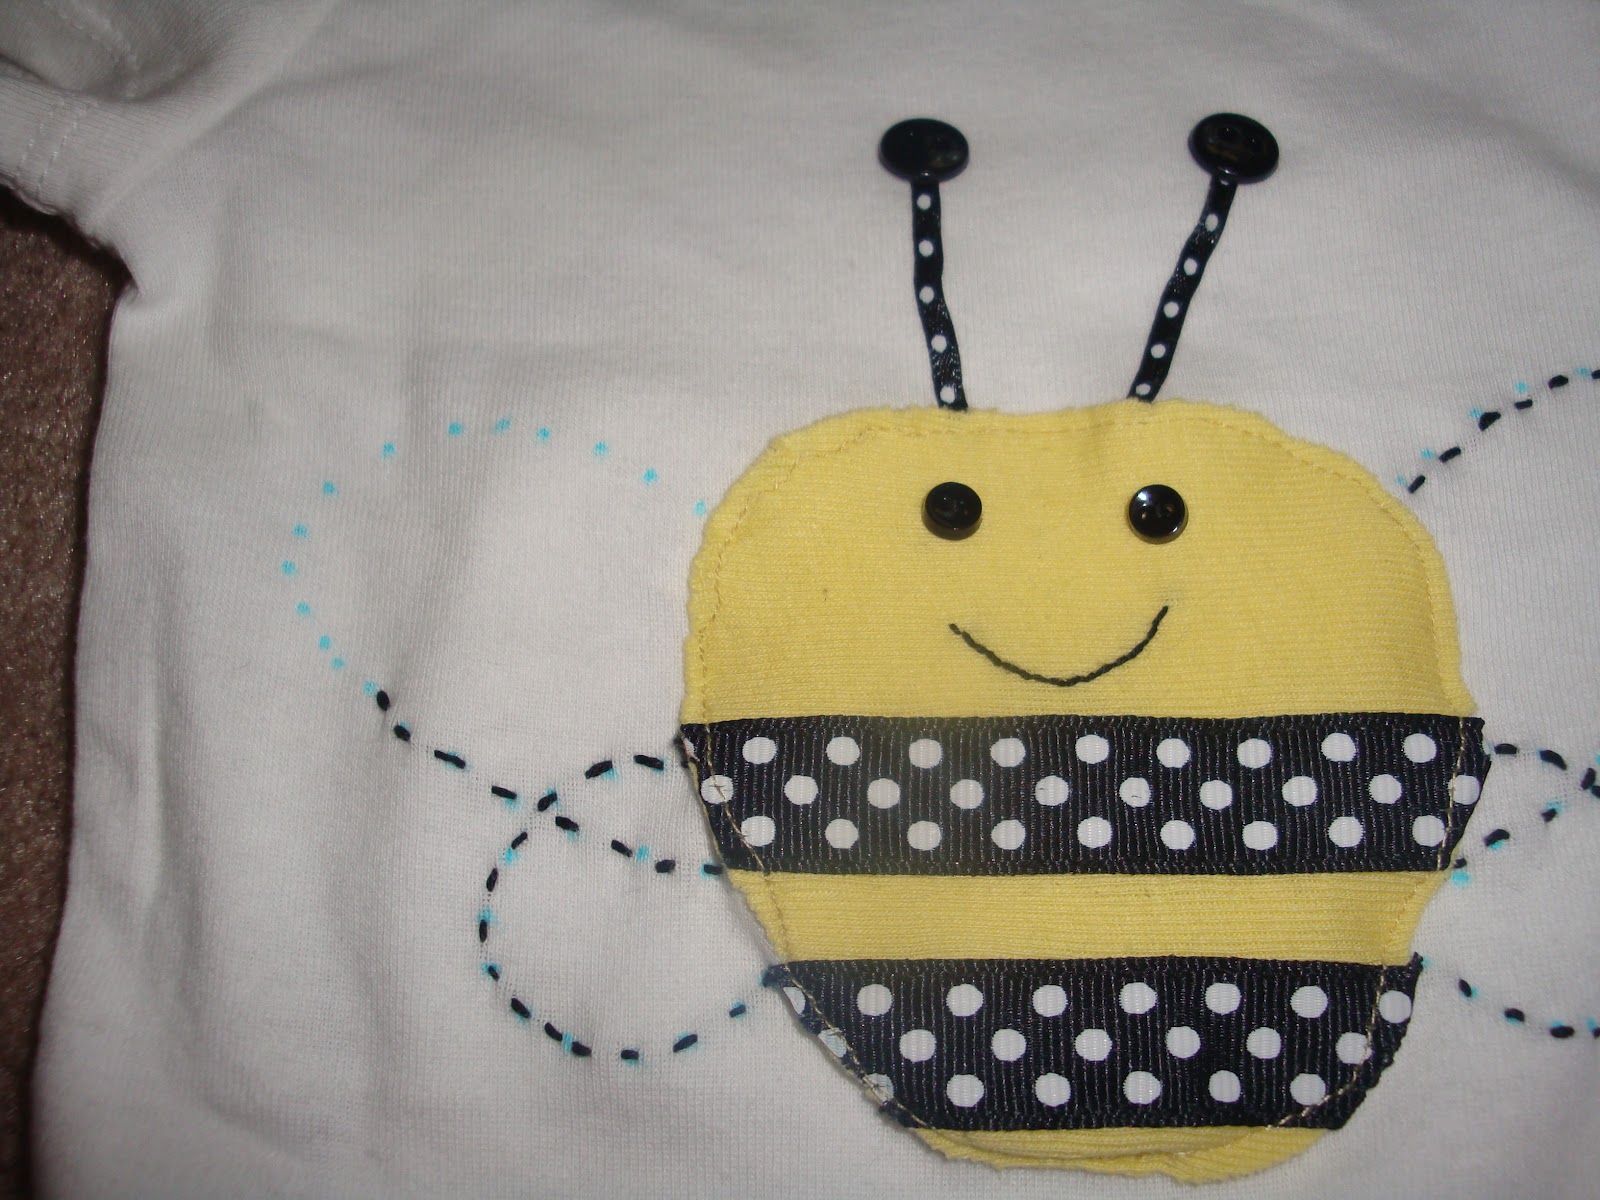

The bee went together fairly easy because all my fabric was knit and would not ravel so I did not have to work about frayed edges.
 You could do the same thing but use a more "manly" :) animal for a boy.
So what are you up to this week?
Linking to some of these great parties:
www.watchoutmartha.net
Linking to some of these great parties:
www.watchoutmartha.net
www.cheerioesandlattes.com
http://staceyembracingchange.blogspot.com
www.weliketoleanaswego.blogspot.com
http://bloomdesignsonline.blogspot.com/
http://staceyembracingchange.blogspot.com
www.weliketoleanaswego.blogspot.com
http://bloomdesignsonline.blogspot.com/
Andrea, this is so adorable!!! I can't wait to put it on Harper, she will look so cute! Thanks so much for making this and I will send some pictures your way! It was great seeing you all yesterday, can't believe how big Conner has gotten!! Thanks again!
ReplyDeleteThat is SO cute!!! I love it!!!
ReplyDeletehttp://stacysewsandschools.wordpress.com
Stinkin' cute! I love bumblebees!!!
ReplyDeleteThanks for linking up this week!
Stacey of Embracing Change
Adorable! I love the bee applique! This came out great.
ReplyDeleteif you email me ChickenScratchNY (at) gmail.com I can try to help you with your pictures. Do you use Picasa?
This is precious! I love it; especially the buttons on the bottom. I'm a sucker for cute things on little tushies! :) haha
ReplyDeleteThanks for sharing this great post on Saturday Show & Tell @ Cheerios and Lattes last week! :) Hope to see you again this weekend! :)
Mackenzie