Showing posts with label wreath. Show all posts

Wednesday, May 9, 2012

Diaper Wreath

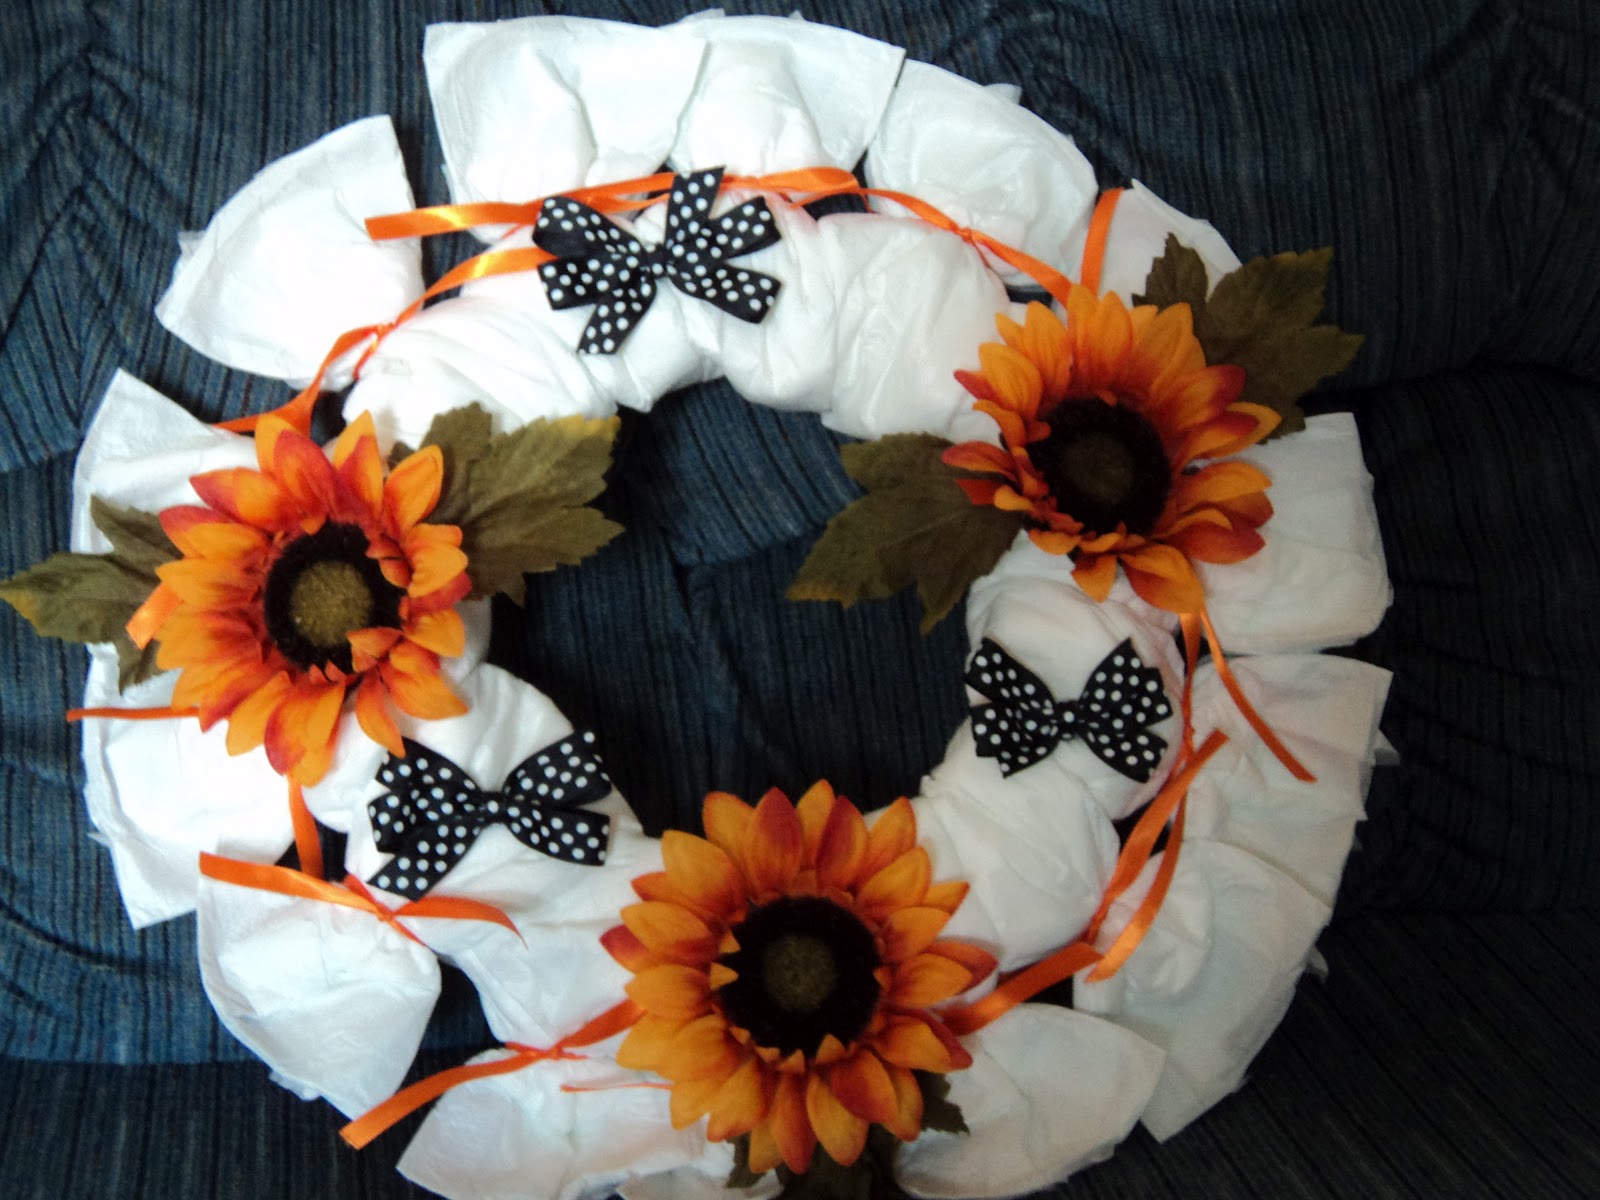
I have seen diaper wreaths and diaper cakes every where lately.  They are super and make an adorable gift but some are way over priced.  I can not even fathom how some people could be able or willing to put over $50 in a diaper wreath.  I am sorry I love cute, I love adorable, but I am practical. It has got to be affordable.  Ok I can hear some of you "she is just being cheap", not cheap but smart and crafty.  :)   I decided I could make one just as cute for a much more manageable price. 


Again let me apologize in advance I do not have tutorial pictures.  Sorry I was not a blogger when I made this wreath so I only have a picture of the finished product, but trust me you can follow it with out pictures.  Plus there are tons of tutorials out there.  I saw a very cute one tonight from http://www.cheeriosandlattes.com/ and it made me decide to go ahead and post about mine. 

Materials you will need: (or at least that I used)
Foam wreath form (very cheap from JoAnns or Michaels)
Diapers
Thin ribbon
Flowers (or blocks or baby toys anything you want really)
1/2 inch ribbon for bows (again you could change it up to anything you would like to decorate with)

Then I took my diapers and turned them backwards so that all you could see was the white part.  I wrapped the diaper around the wreath and then pinched it tight at the top and secured it with a ribbon.  Most people tie bows or use wire but I liked it just knotted with the ribbon flowing down some.  As you add a new diaper just push the others close together.  I thought I had tied my last diaper about 3 times but then I could always push them closer for one more.  :) 

After you are happy with your diapers, you get to decorate.  This is where you can be as creative as you want.  You can add ribbon, toys, flowers, bows, towels, wash cloths, blocks, etc.  I have seen tons of different ways.  I liked cute and simple a little better than the ones that were filled with so much stuff.  I decided to stick with a few large flowers and some pretty bows. 

I tied up a few bows, pulled my flowers apart and got my hot glue gun heated up.  Then just arrange your decorations the way you would like and get ready to glue them on.  Try to pull the diapers apart where you want to stick things so you can glue to the form and not the diapers.  (That way the diapers can still be used later.)  If you do get some glue on a diaper you can always just give a few extra diapers to the recipient to use in place of the glued one.

Well that is the basic idea have fun, change it around and do what you think is adorable.  They make very cute gifts that don't wilt like flowers and that can be hung up even at a hospital. 

Linking to:
http://www.sugaranddots.com/
http://www.somedaycrafts.blogspot.com/
http://www.733blog.com/
http://www.ladybug-blessings.com/
http://www.funkypolkadotgiraffe.blogspot.com/


Tuesday, April 17, 2012

Springy Ruffle Wreath

Ok I have a quick, easy, and very cute craft to share today.  Spring has sprung and every where I look I see these adorable wreaths on doors.  Most have big ribbons and flowers, and while I am not against that look, it is everywhere and well I wanted something a bit different.  I needed a springy cute wreath for my door that didn't cost a fortune.  I found a blog called Tattered and Inked and she had made a huge ruffly wreath with a bright pop of color so I decided to try my hand at it.  I did not put near as many ruffles on mine because I liked the material better and well pushing 100 plus straight pins into a foam ring starts to wear on the fingers.  So it turned out to be a bit mismatchy but fun and I love it!!  Hope you enjoy.


I do not have a complete tutorial for this wreath (again made it before I entered blogging world) but it is very simple and I will break it down for you.  I bought a cheap foam wreath from Michaels, but any wreath form will work.  Then I found some super fun and bright fabric from Hancocks and some brown felt.  I cut a skinny long rectangle out of my material and then wrapped it around my wreath form and pinned it.  Oh use small silver topped straight pins so they don't show.  Ok now for the part that takes a bit more time.  You need to trace and cut out lots I mean lots of brown circles.  You can make them as big as you want just play around with different sizes of circles.  (Plan to cut the circles when you have lots of time on your hands like if you are riding in the car or you can cut them out while you watch tv.)  After you have your circles you will want to pinch and twist them and then stick a pin in them.  You can put as many or as few circles as you want.  The wreath I saw was completely covered with felt petals but I wanted my fabulous fabric to show more, so I went around in a thin line.  Then I took the same fabric and cut out a very thin super long strip to make a bow out of.  I used pinking shears to cut mine to add some cute detail to the sides.  Then I tied a floppy big six ruffle bow. 

I found a big button in my stash and sewed it to the middle.  Lastly I pinned it on the wreath.  I wanted a little more contrast so I added some pale blue ribbon with brown polka dots.  (who doesn't love polka dots) The ribbon did not really match but it works for some reason.  I also used the ribbon to make a loop at the top to attach it to my door.  Ok now go out and make one for yourself.  Change it around a bit and make it your own.  :)  You could also add a painted wooden letter instead of a bow or in the middle for your last name if you would like. 

 Linking to
http://funkypolkadotgiraffe.blogspot.com/
http://ladybug-blessings.com/
http://thecreativeitchboutique.blogspot.com/