Showing posts with label cooking. Show all posts

Monday, December 3, 2012

Hashbrown Casserole

I had a ton of cooking to do for the Holidays and we always have my husband's family reunion the Sunday after Thanksgiving so there was even more cooking to be done.  Neil has a cousin that always looks for something different and has always complimented my new recipes.  While that is wonderful it always adds the pressure on to impress him with something new and something delicious. 

Well this year was busier than normal with and unexpected passing in the family and I got sick as a dog Thanksgiving night.  I did not feel good, did not feel like cooking, and definitely did not feel like trying something new.  So I made some reliable recipes and then stumbled upon and new recipe while I was looking for something easy to do with hash brown potatoes.  The blog, Never Trust a Skinny Cook had a recipe for "crack potatoes." 

They looked good and easy so that made them perfect to try and they did turn out great, but again I modified the recipe.  I saw some comments that they were great and then a few that said they were too salty and had too much ranch.  So I decided to cut back some of the ingredients and they turned out great!
*original recipe can be found here. And again apologizes for only 1 picture.  I was sick and did not think about it till the casserole was almost gone.

Ok here is what you need:
*Bag of shredded hash brown potatoes (I used fresh not frozen but I am sure it would work either way)
*16 oz container of sour cream
*1 pk of ranch dip mix
*1 small container of plain Greek yogurt
*2 packs of real bacon bits (toasted up/ you could use regular bacon and crumble it but I felt bad and was going for easy and fast)
*2 cups of shredded sharp cheese (save a little to the side to top with or add extra)
*Pre heat the oven too 400

Now mix the sour cream, ranch mix, yogurt, cheese, and bacon bits together in a large bowl.  Then stir in the hash browns and mix well.  Now spread into a casserole dish.  I did not have a 13x9 so I used a disposable tin pan that was 11.5 x 9 or something like that, but I think either size would work fine. Sprinkle the left over cheese or extra on top and then cover with tin foil.  Bake at 400 for about 40 minutes and then remove the foil for the last 5 minutes to give it and nice little crust and browning.

Now enjoy!  Well let it cool a bit or you will burn your tongue. :)

It was so good and everyone was pleased with it.

Thursday, November 29, 2012

Strawberry Banana Pudding

I know it has been a while but I am finally back and have some great recipes to share in the next few posts.  Today I wanted to share my take on Paula Deen's Not Yo Mommas Banana Pudding. 
You can find the orginal recipe here.  (Also sorry but I was sick and busy so I only took a few pictures, like 2, sorry.)


*Disclaimer*  If I haven't said it before or if this is your first time stopping by I am not a follow the recipe kind of girl.  I will follow the basics of it but always change it up and add to or take away.  I also am not a measurer.  I like to eye ball most of the things I add. With that said,  I will try my best to get you a close measurement but cooking is all about trying new things and blending new things together and well just having fun.  So have fun if you think it will work try it, the worst that can happen is it will be inedible.  :)

A friend at church made the original recipe and I tried it one night.  It was good but super sweet.  I could only eat a little of it but I liked it and well I wanted to make it for an upcoming dinner.  I knew the basic recipe was good but I needed to cut some of the sweetness out. 

I decided some strawberries would add some tang and that if I made my own whipped cream it would not be as sweet.  I also used less sweetened condensed milk and added some Greek yogurt.  I also used less pudding.

Not huge changes but it made a difference and what came about was great!  So here is my recipe.

Ingredients:
-2 boxes Pepperidge Farm Chessman cookies
-2 cups of milk
-1 box 3.5oz of instant French vanilla pudding
-4 to 5 ripe bananas
-small bag of frozen sliced strawberries (thawed) (make sure no sugar has been added) *you can also use fresh I just didn't have any at the time
-8oz of cream chz (softened)
-small can of sweetened condensed milk (around 14 oz but you will use a little less)
-12 oz of heavy whipping cream (you can use cool whip if you want for ease I did once when I had no cream and it was still ok I just used less than the 12 oz)
-small container of plain greek yogurt (I used Oikos 5.3oz size and I actually ran out of the plain and used the strawberry this last time and it worked)

Ok line the bottom of a 13x9 pan with one bag of the chessman cookies.  Next top with sliced bananas and then add a layer of sliced strawberries on top. 


Then in a small bowl mix the milk and the pudding on medium for 2 minutes and set aside.  Now mix the cream chz with the condensed milk.  I used most of the can I just did not scrape the sides but most had come out. (sorry again that I can not be more specific) Blend it till it is nice and smooth then add in the yogurt and stir well.  Now whip the heavy cream in another bowl on high until peaks appear.  Mix the bowl of pudding with the cream chz mixture and then fold in the whipped cream. 

Now pour the mixture over the cookies, bananas, and strawberries.  You will have more filling than you need (even the original leaves you with extra) so you can save it to use as a dip for fruit or cookies or make another small dessert, but you would need more cookies, bananas, and strawberries.  Now top it with the other bag of cookies and allow it to chill in the refrigerator. 

Pretty and delicious!
 
Linking to some of these great parties!

Sunday, October 28, 2012

Dreaming of Ham / PreThanksgiving

I am so not ready for the Holidays yet.  Time is flying by way too quickly.  I can not believe this week will be Halloween.  AHHH!!  Five million times ahhh because I have so much/want to do.  With all of that said I am however very very ready for the food that comes with the approaching holidays.  So much so that I have been dreaming about it. 

And the thing I am most dreaming of .... Ham.  Not just any ham not deli ham, *ick* but real ham.  Pink ham!  Well at least that's what I have always called it.  You only get "pink ham" on holidays, Thanksgiving, Christmas, and Easter to be exact.  You know the ham I am talking about that has that wonderfully rosy color is super delicious and oh so bad for you.  :)  I think it is technically called a smoked ham but I grew up calling it pink ham and still do.  (I learned the hard way the 1st year I tried to buy one from the store and the butcher thought I was crazy and had no idea what I was talking about.  Funny story but completely off topic. Maybe I will share at another time.)

Anyway back to the ham.  I have been thinking about that ham for days and I told myself I only had a bit longer to wait and well then I decided why wait.  I wanted ham and I could have it.  Totally fine to have ham on a non holiday, except when I start meal planning I tend to get carried away a bit. 

At first I just wanted a nice meal of ham, potatoes, and cabbage.  Well then it grew into that I had some carrots and those would be good too with the potatoes.  Next I noticed some great looking raspberries at the store and decided I would make some lemon raspberry mousse squares for dessert since I already had the Nilla wafers.  (If you would like the recipe it is here.)

Nice meal but not totally satisfied.  While washing dishes I thought how great some devilled eggs would be.  I mean who doesn't want devilled eggs with pink ham. 

Now I had been cooking and washing dishes most of the day, due to making baby food, so I thought that I should spread the wealth a bit.  It would be Sunday after all and I did not want to be in the kitchen all morning before church.  So now my little dinner has turned into a Pre Thanksgiving meal.  :)

I called my parents and they are bringing some tea and some kale.  My brother is bringing the deviled eggs and I am providing the rest.  Only thing missing is some pumpkin but I am trying to be good.  Hope you are having a wonderful weekend. 
What is one of your favorite meals?

*Update*  Sorry no pictures.  We devoured it. 

Monday, October 22, 2012

Bob the Builder


I have been meaning to post this for months but kept forgetting and lost the blog so here we go.  For my little guys 3rd birthday he wanted Bob the Builder.  Well Bob was super popular a few years ago but now he is hard to find.  Went over several different ideas for what he wanted - sheet cake that had a road made out of graham crackers in the shape of a 3 with machines digging dirt (crushed oreos) and toy figures of some of the machines and Bob, dump truck cake, and a cake shaped like Bob.  Well I could not find any little figures and Conner wanted Bob not just the machines. 

I am by no means a pro when it comes to decorating cakes but I do enjoy playing around with it.  I finally decided to make a Bob out of round cake pans like I did my owl.  (You can see that post here)  I cooked my cake using two round 9 in pans and then drew out a pattern for my pieces.  If you need a better idea about how to use pans to create a templete and pattern check the owl post I mentioned earlier. 

After the cake cooked I let it cool for a while and long while so that it would not fall to pieces when I cut it.  Also a good idea to add some pudding to the mix to help it be firmer.  While the cake was cooling I made my icing.  I have a huge sweet tooth but I do not love buttercream icing, it is just too sweet to me.  I like to buy the Wilton whipped icing and make it myself.  (You can get it from Walmart or Micheals) It is not near as sweet or as firm as buttercream so while it is deliscious it does not hold its shape as well.  I make all the icing in a large bowl and then take a little out for each color I need.  I use the Wilton icing dye to color my frosting.

Ok now that the cake is good and cool, you will begin cutting out your pieces.  Lay your pattern on your cake and carefully cut out the parts you need.  I left one circle whole and then cut out my ears, nose, and hat pieces.  The hat is 3 different pieces. The bottom is a little less than half of the other cake and then I cut two pieces to make the brim of the hat and the ridge that runs up it. 


After I placed my pieces I frosted it.  Frosting took some time with all the corners and turns and I was not happy with the eyes and mouth but overall there was Bob and my 3 year old was tickled!  I know you can not see his happiness from the pictures he was not excited about the camera but he was happy about the cake. 


Not as nice as a professional cake but much much cheaper.  Instead of $20 for a cake I probably only have $5.  And it was super yummy. 
 
Linking to some of these great parties


Monday, October 15, 2012

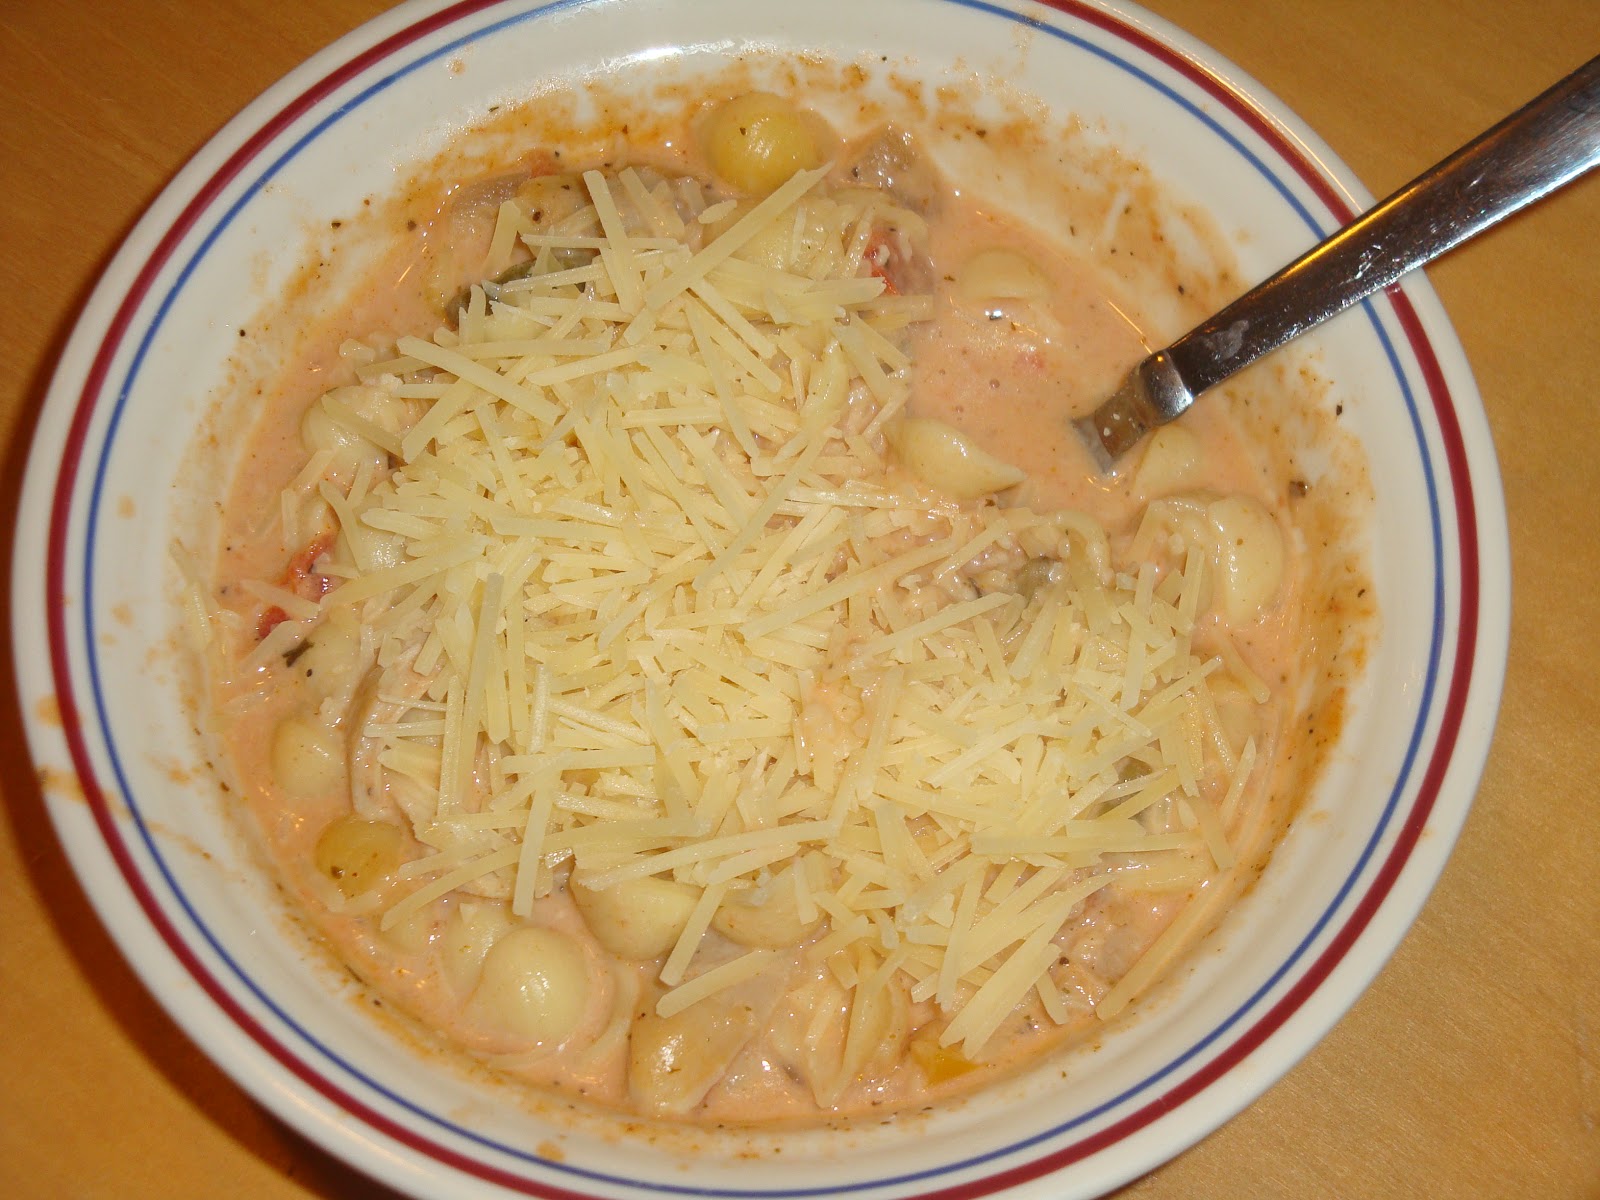
Italian Chicken Noodle Soup

This is a super fast, super cheap, super yummy, super soup and one of my new favorites!  I found this recipe on Pearls, Handcuffs, and Happy hour and just knew I had to try it.  I love soups and with it finally feeling like fall I was ready for some warm comfort.  I modified her recipe some to make it faster and cheaper but if you would like the original you can find it here.


Ok here we go this soup is very quick to put together and it just gets better as you eat it.  It also heats up well, for left overs.

Ingredients:
-1 bag of frozen stir fry mix that contains onions and a variety of peppers (thaw in the refrigerator a few hours before or the day before)
-2 tbs of dried oregano
-1 tbs cheyenne pepper
-1 tbs of olive oil
-2 cans (28oz) of diced tomatoes with garlic, oregano, onion (I used Hunts)
-8 cups of chicken stock (about 1 1/2 large boxes I used Swanson reduced sodium)
-Rotisserie chicken with the meat pulled off
-box of small noodles (I used small shells but wanted the Ditalini)
-1 3/4 cup heavy cream
-bag of shredded Italian cheese or shredded Parmesan

*I only used two pots for this dish but to make it a one pot wonder just cook your noodles first and then leave them in the colander until you are ready to add them to the soup.

In a medium pot cook your pasta till not quite done.  My shells called for 8 minutes but I stopped cooking at 6 minutes so they could finish cooking a bit in the soup but they would not get mushy.  No one wants mushy noodles.

Ok in a large pot add 1 tbs oil and 2 tbs dried oregano.  Stir just until it smells good, just a few seconds.  Then add the bag of onions and peppers and cook until soft about 10 to 15 minutes.  Next add the stock and tomatoes and cheyenne.  Bring soup mix to a boil and then add the chicken and reduce to a simmer.  Simmer for just a few minutes then remove from heat and add noodles and stir in the cream. 


Now ladle it into a bowl and top with as much cheese ( I love cheese so don't judge my portion) as you would like and enjoy.  It is rich and creamy and oh so good.  It really seems to get better with each bite. 

Yum doesn't that look great!  I also think it would be yummy even with out the cream added.  So if you are watching your waist add less cream or none at all but I do feel it is worth the splurge. 

I do apologize for the pictures but I had already eaten a bowl full before I remembered to get a picture.  It really is that good.  Enjoy and thanks again to Pearls, Handcuffs, and Happy Hour for the inspiration. 
Oh and the soup shouldn't cost more than about $12 to make and it fed 6 people with left overs so I would say around a dollar per serving.  (Which we probably consumed way more than a serving.)

Linking to some of these great parties


Tuesday, October 9, 2012

Lemon Raspberry Mousse Squares

I have a ton of apologizes to go with this post first it is months late and 2nd I kept forgetting to take pictures and by the time I remembered it was gone.  It really is that good that is doesn't last.  Hopefully I can update this post soon, with my pictures because I just got some great berries from the Fresh Market yesterday so one of these may be in my near future.  Anyway here is my very old post. :)
picture is from nilla Wafer website and is the property of kraft food and nabisco


Ok I know it is like several months late but here is the fabulous dessert I promised.  I made this for Father's Day and it was gone.  I mean gone before everyone got some and there were more desserts there than just mine.  It looks super pretty so it is very inviting and it tastes  superb!  I can not take credit for the recipe, it came from the Nilla Waffer box a year or two ago.  Just a heads up I did follow the recipe exactly the 1st two or three times I made this and then I decided to change it a bit to make it easier.  (I will tell my changes as I go, nothing major just a lazy I mean easier way.)

Ok here is the list of ingredients and supplies you will need.

- 3oz box of lemon jello (not the pudding the jello)
-1 cup boiling water
-1 cup of ice
-8oz pack of cream cheese (softened)
-8oz container of cool whip
-1/4 cup sugar
-2 tsp lemon zest (optional- I didn't have any this time so I didn't use it and I could not tell a difference)
-48 Nilla Waffers (I did not count mine out I just used what I needed.  I also think any plain cookie would work for this, shortbread, or the Pepperidge Farm chessman)
-1/3 cup Seedless raspberry preserves
-fresh berries for topping

-small bowl, large bowl, 8x8 pan, electric mixer, spoons, cling wrap (optional)

Ok put your lemon jello in the small bowl and dissolve it in the hot water stirring for 2 minutes.  Then add your cup of ice.  (It can be cubes I just put enough cubes in a 1 cup dry measuring cup to fill it up.)  Stir until the ice dissolves.  Now set that to the side and cream your sugar and cream cheese together using a mixer.  Once it is combined add your lemon jello and mix it.  Then stir in 2 cups of your coolwhip.  This is also the point where you would add your lemon zest but I didn't have any so I worked without it.

{The original recipe which you can find online, has a specific number of cookies for you to put around the sides and on each layer it also has you line the pan with cling wrap so you can invert it.  I did not follow these steps.  It is just as pretty in the pan.  I just turned their sequence of steps around so my dessert would be the way theirs was once it was inverted.}

Ok so now place your cookies in the bottom of your pan.  Then poor half of your lemon mixture on top of your cookies.  Now top with another layer of cookies.  Next  heat your preserves in the microwave for about 15 seconds on high.  If it has not melted it some then do it a little longer.  Spoon your preserves on top of your cookies and kinda mash it out a bit with the spoon so it will spread some.  Now pour the rest of your filling on top.  Then if you would like add a few cookies to the top and decorate with some fresh berries.  Now just cover it and refrigerate for a few hours and then enjoy!!

If you want the original recipe just go to the website for Nilla Waffers here.

Thursday, May 3, 2012

Everything but the kitchen sink Meatloaf

Ok before I get to my post for today I wanted to let everyone know about a fabulous give away that is going on over at Emily's blog. http://emilymmeyers.blogspot.com/2012/05/giveaway-time-again.html Hop on over and visit with her and enter to win a great give away from MODCLOTH.  Ok now time for my great recipe.  :)

Pink slime!  Everyone has heard about this right?  Yuck, I am already a picky meat eater but when I heard about pink slime I really thought I am done with hamburger.  I am not the biggest fan of the stuff anyway.  Every time I have been preggers that is the one thing I can not eat, cook, or stand to smell.  So after I heard about the nasty stuff in our hamburger I was determined to not feed it to my babies.  Well I found the wonder of a "Fresh Market"  Yay have you been there?  It is a wonderful place, like the best store ever!  I live in a very small town and we do not have this wonderful luxury near, I have to travel over an hour for the nearest one. 

Anyway this post is not about how great the store is or how I wish we had one closer or how I am only buying safe beef and chicken for my family (I don't need the pork cause I talked my father n law into raising some pigs) but about a recipe for meatloaf.   I made some of the best meatloaf EVER last night! And remember I am not the biggest fan of hamburger but it was great!  I started with some fresh ground, antibiotic free, hormone free, humanely raised beef (sorry this pink slime got to me).  After the hamburger I decided to throw a little bit of everything in.  And when I say everything, I mean everything.  Which is what lead me to the name of my dish. :)

Here is what I put in my meatloaf:  1-2 lbs hamburger (mine was ground sirloin), salt, pepper, 1/2 of a bell pepper (minced), 1/2 of a small onion (minced), garlic, paprika, cumin,  ground cayenne red pepper, bread crumbs, 1 egg, dijon mustard, Worcestershire sauce, Tabasco sauce, grated Parmesan cheese, and shredded cheddar cheese


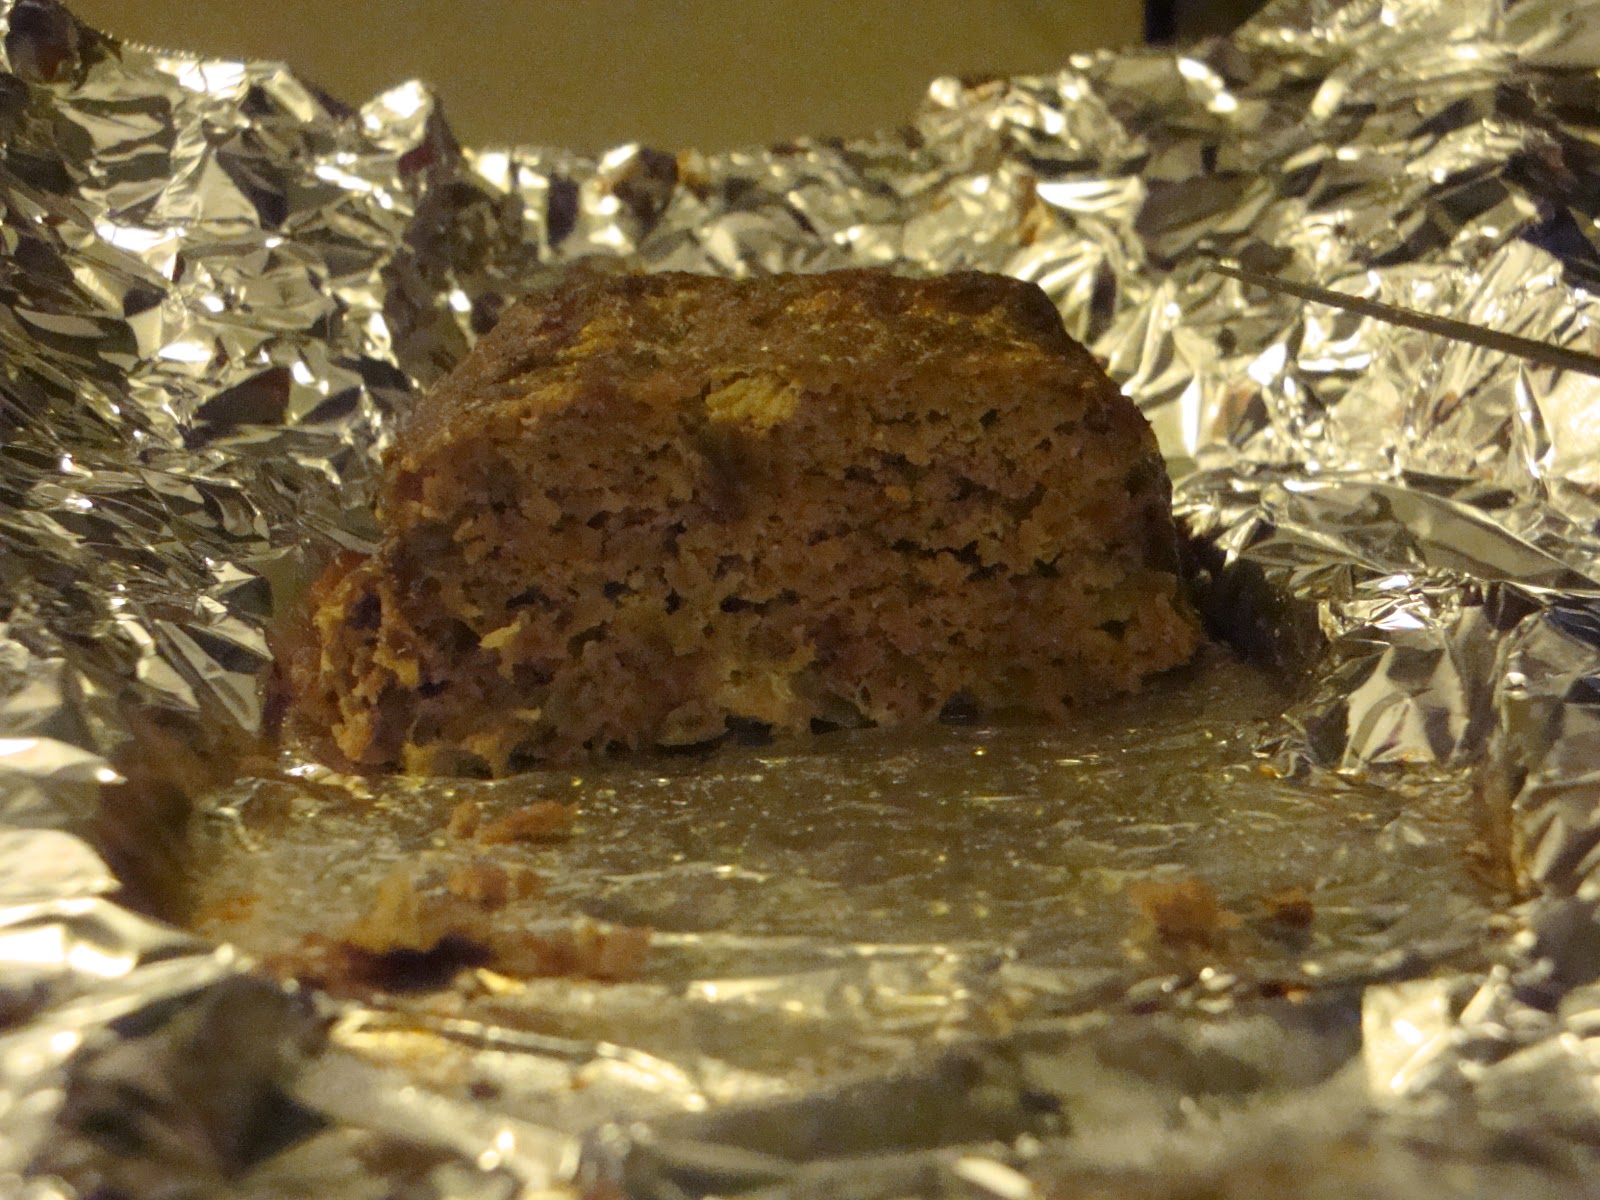
I did not measure anything.  Sorry.  I am just not that kind of cook.  Not to say I never measure, but when I am just playing with something new well I don't really worry with measuring.  I add till it looks/tastes right.  (I did not tasted this DO NOT taste raw hamburger)  I am sure no one will but better safe than sorry.  So I added all of those ingredients until I was satisfied with it.  I did not go over board with any of the spices but I did add quite a bit of mustard, probably around 1 1/2 TBS.  Then I mixed it well and shaped it in the form of a loaf.  I placed my meatloaf on a foil lined baking sheet (cause who needs dishes) and put it in a preheated 350 degree oven for an hour.  Most of the cheese oozed out but it was on the foil so who cares.  :)  Anyway it was super great so I thought I would share.


my plate (sorry I had been eating before I snapped a pic)

sorry I do not have great photo skills, but it was still yummy (you can see the cheese)
I pretty much grabbed every spice I could find and well anything I thought might work with hamburger.  My friend Alana would have called this "garbage burger"  :)  but it was great.  I didn't know if it would all work but that is most of the fun with cooking, the experiment.  The few times I have followed a recipe completely it has flopped, but when I take one and change it up a bit it just seems to work. So give it a try.  I am sure there are plenty of other spices that would work well or maybe better.  Have fun, cooking shouldn't be stressful, be creative, be daring!  And please share if you make it or change it up or if you have a super meatloaf recipe.

Wednesday, March 28, 2012

Cutest Owl Cake and Decorations

I made the cutest (well in my opinon) owl cake last Saturday for my little boy's baby shower.  Unlike a traditional shower that happens before your little bundle of joy arrives, we had a welcome to the world shower.  Gavin decided to come 2 weeks before the scheduled shower and about 6 weeks before his due date.  I had never been to a shower for the baby after they were born so I had no idea what kind of invites to send out.  I finally thought of "Looks Whos Here" and that led me to the idea of owls.  I did not have a blog then so I only have a few pics, sorry but here are a few of my ideas. 

First, I googled owl cakes and found Anita's blog "Leave Room for Dessert" she had the cutest owl cake and great instructions.  I did not follow her recipe but I did use her idea of tracing my pans and then drawing my pic and cutting out my pieces.  I used a regular box of chocolate cake mix and added half a box of instant choc pudding to help the batter be firmer so it would be easier to work with and I used applesauce instead of oil.  (It was super yummy by the way) After I cooked the cake and it cooled for awhile I traced my pans and then drew my owl on those circles.  I then cut out my pattern pieces to see what I would need to cut from my cake. 
My cut out cake.  One whole round was left alone and I cut the other one up.  Again sorry I did not take pics of the process but check out Leave Room for Dessert for a more detailed tutorial.
Some of my pattern pieces.
I laid my pattern back on my cake to see where the frosting should go.  I used a toothpick to poke holes in the cake to leave the design so I could frost around it.  And I was not exact so just have fun with it.

I made my own icing from a Wiltons box that I bought from Michaels.  I don't like the super sweet stuff so I used the whipped icing.  It is yummy but it does not get firm so it will not show the details that buttercream will.
Frosted cake :)
I made one large bowl of icing and then pulled out a little bit at time to color. I used the Wilton icing dye not food coloring and I used M&Ms for the eyes.  Over all I think it was adorable, not professional but perfect for me and my boys will know it was made with love. 

I also made the very few decorations for the party.  I could not find anything in the stores so if you can't buy it make it!  Way more fun and super cheap.  I picked up 6 pieces of felt from the store for 0.29cents each.  Then I drew out different owl parts wings, eyes, body, etc in differnt sized and started tracing on my material.  A little hot glue and a few buttons later (buttons were for the eyes) and here are my owls.

Felt owls (sorry bad picture and this is only a few of them.)
Anyway this was super fun and super cheap to do.  A store bought or professionally made cake would have cost me more than $20.  Mine was about $6 and a little time baking with my family and planning out the design.  The owls cost about $2.  I think it was successful have fun and if you make a owl cake let me know.

Linking to:
http://funkypolkadotgiraffe.blogspot.com/
http://www.ladybug-blessings.com/
http://www.creationsbykara.com/
http://www.733blog.com/
http://www.somedaycrafts.blogspot.com/
http://www.sugaranddots.com/
http://www.katiesnestingspot.com/
http://weliketolearnaswego.blogspot.com/
http://www.herecomesthesun-kelly.blogspot.com/
http://www.shabbynest.blogspot.com/
http://www.504main.com/
http://www.kojo-designs.com/
http://oneartmama.blogspot.com/
http://www.chickenscratchny.com/2012/05/whats-cluckin-2-birthdays.html
http://thegrantlife.com/
http://www.watchoutmartha.net/